Table of Contents
ToggleConverting a shed into a bedroom has moved from quirky DIY experiment to genuinely viable solution for homeowners facing space constraints, aging parents needing independence, or teenagers wanting their own retreat. A shed bedroom offers affordability, proximity to your main home, and a blank canvas for personalization. But transforming raw structure into a livable space demands attention to basics: structural integrity, code compliance, insulation, utilities, and comfort. This guide walks you through every step, from assessing whether your shed is conversion-ready to finishing touches that make it feel like home rather than a repurposed storage box.
Key Takeaways
- Shed bedroom ideas start with assessing structural integrity, foundation soundness, and local building code compliance—most jurisdictions require a minimum of 70 square feet and 7 feet of headroom.
- Electrical and plumbing are the largest upfront costs; hire licensed professionals for proper code-compliant installations (budget $1,500–$3,000 for electrical and additional for plumbing) rather than DIYing these critical systems.
- Proper insulation (R-13 to R-21 in walls, R-38 to R-60 in roofs), air sealing, and weatherproofing create a year-round comfortable space and prevent moisture and mold issues.
- Design shed bedroom layout with multiple light sources, built-in storage to maximize vertical space, and at least one properly sized operable window (minimum 5.7 square feet) for emergency egress—a non-negotiable safety requirement.
- Scale furniture to the small footprint (twin or full bed instead of queen) and add personal touches like mirrors, textiles, and accent décor to transform raw space into an intentional, comfortable bedroom.
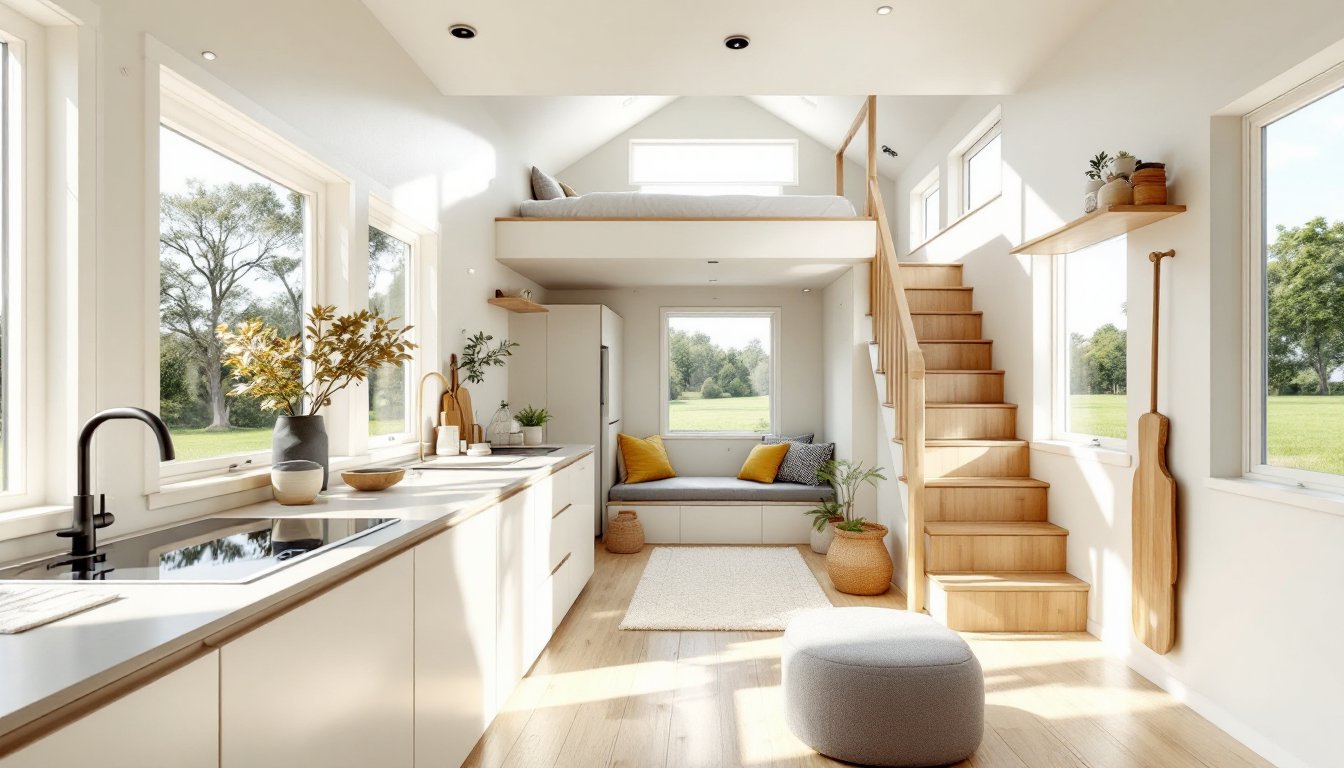
Planning Your Shed Bedroom Layout And Space Optimization
Assessing Shed Size And Structural Considerations
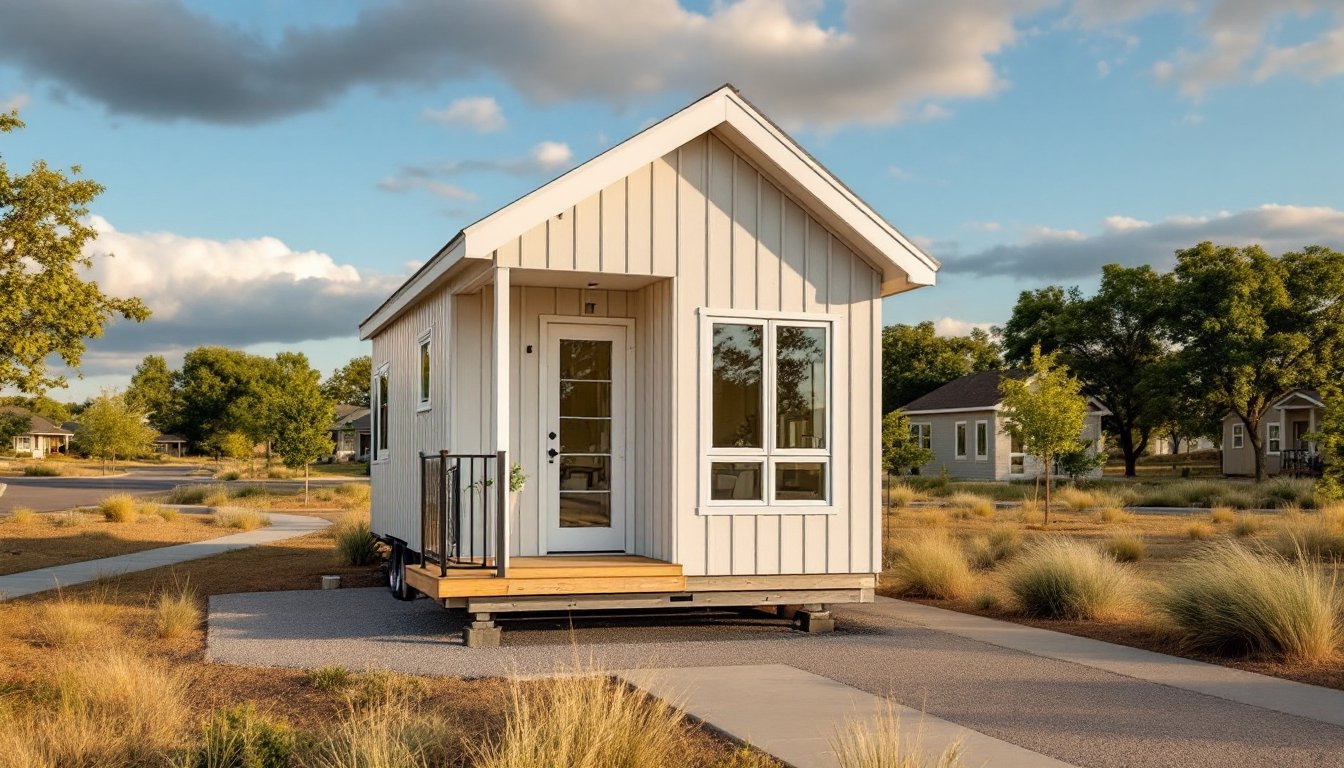
Before you swing a hammer, verify the shed will actually work as a bedroom. Most building codes require a minimum of 70 square feet and at least 7 feet of headroom for a legal bedroom, check your local jurisdiction’s IRC (International Residential Code) requirements, as they vary. Measure your shed’s interior: length, width, roof height at the peak and at the walls, and note any posts, trusses, or obstacles. A shed with an 8-foot-tall wall and peaked roof gives you workable vertical space: one with a 6-foot wall and sloped ceiling creates serious layout constraints.
Inspect the foundation and framing carefully. Is the floor level, or does it slope? Are the walls plumb and the roof straight? Look for rot, mold, carpenter ants, or termite damage, particularly along the base and around any roof penetrations. A structurally sound floor system is non-negotiable: if joists are soft or missing in spots, you’ll need to sister (double up) new framing or replace the subfloor before you insulate. Check if the shed sits on a concrete pad, gravel, blocks, or a proper foundation. Gravel or insufficient foundation will shift and cause cracking, water intrusion, and settlement issues later.
Consider whether the shed requires a building permit for conversion. In many jurisdictions, converting a shed to living space triggers permit requirements because you’re changing occupancy classification. This isn’t a sneaky workaround, it’s the right call and often costs $300–$800 in permit fees, depending on your area. A permitted project also protects you during sale and with your insurance.
Essential Infrastructure: Electrical, Plumbing, And HVAC Systems
Running electrical and plumbing to a shed bedroom is the biggest upfront investment and where most DIYers should call a licensed professional. Electrical code (NEC, National Electrical Code) mandates proper service size, grounding, GFCI protection in wet areas, and conduit runs. You can’t simply plug in an extension cord: it’s unsafe and illegal. Hire a licensed electrician to assess whether your home’s service panel can support additional load and to run proper circuits, outlets, and lighting. Budget $1,500–$3,000 for a shed bedroom with standard outlet distribution and a few light fixtures.
Plumbing is equally regulated. If your shed bedroom includes a bathroom, you’ll need properly sloped drain lines, a vent stack, and potable water supply run from your main home with appropriate winterization (drain-down valve or insulation if you’re in a cold climate). Alternatively, a bedroom without en-suite plumbing is simpler: no water lines needed, just a window and proper egress. If you want a small sink or kitchenette, same code applies, hire a licensed plumber.
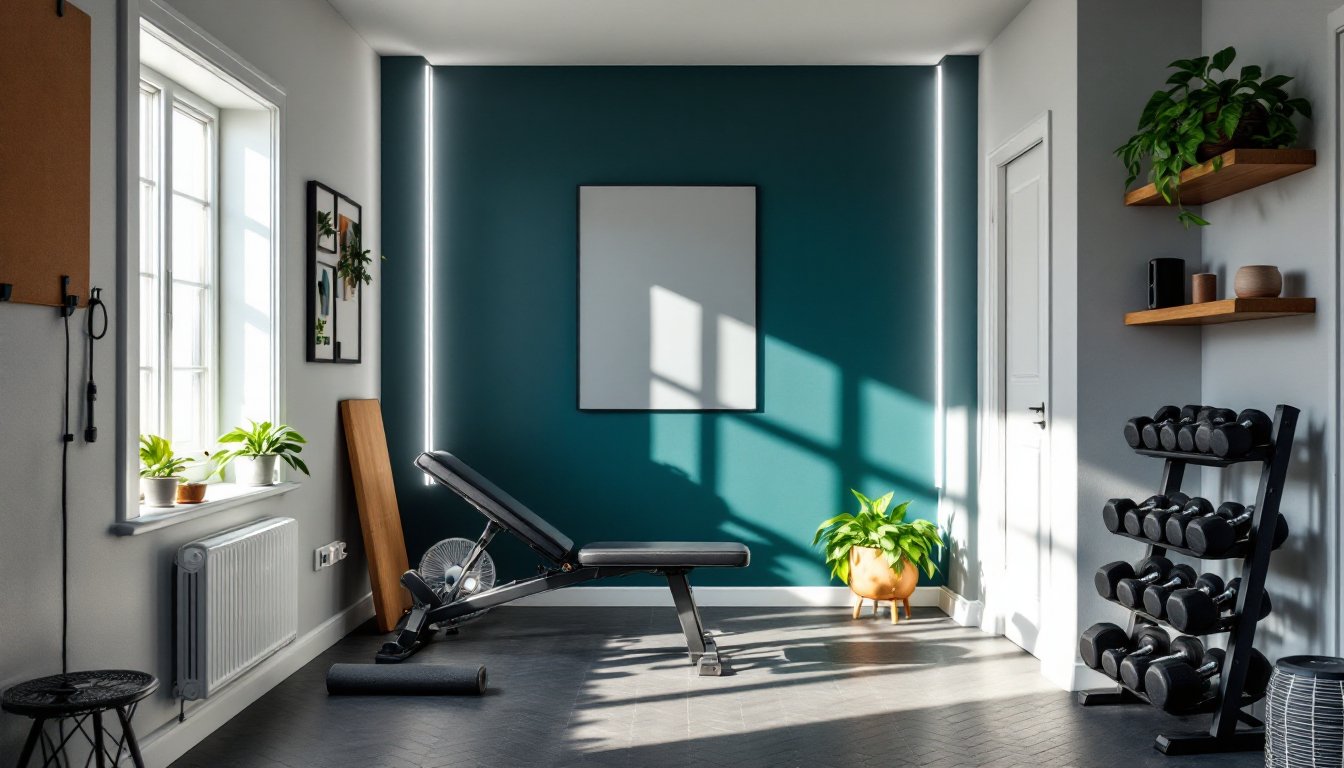
Heating and cooling depend on your climate. In moderate zones, a well-insulated shed with a mini-split heat pump ($3,500–$5,000 installed) or ducted unit handles both heating and cooling. In cold climates, you’ll want real heating, never rely on space heaters as primary heat in a bedroom due to fire risk and code violations. In hot climates, adequate ventilation and insulation prevent the shed from becoming an oven. A simple bathroom exhaust fan ($150–$300) vents humidity: a whole-unit ventilation system costs more but provides fresh air exchange.
Insulation And Weatherproofing For Year-Round Comfort
Proper insulation is non-negotiable for a bedroom, whether in a hot or cold climate. Start from the outside: examine the roof and walls for gaps, holes, or deteriorated siding. Patch or seal any exterior damage before insulating from the inside. You want an air-tight envelope, not just bulk insulation.
For walls, remove any existing interior finish (drywall, paneling) if present, or work with bare studs. Fiberglass batts (R-3.5 per inch) or closed-cell spray foam (R-6–R-7 per inch) both work: spray foam provides better air sealing but costs more. Aim for R-13 to R-21 in walls depending on your climate zone. Wear gloves, eye protection, and a dust mask when handling fiberglass. The attic or roof cavity deserves even more attention: loose-fill cellulose or batts at R-38 to R-60 depending on climate. Air sealing around electrical outlets, penetrations, and the rim joist is as important as the insulation itself.
Weatherproofing means sealing the shed against rain and moisture. Install or repair flashing around the roof edges, any vents, or dormer if present. Flash the transition where the shed connects to your main home if applicable. Use ice and water shield under the roofing in areas prone to freeze-thaw cycles. On walls, apply a water-resistive barrier (Tyvek or similar) before siding or add a rainscreen gap if re-siding. Caulk all exterior seams and penetrations. For the floor, ensure water doesn’t wick up from the foundation: a vapor barrier under flooring and proper grading away from the shed perimeter prevent moisture problems.
Flooring, Walls, And Ceiling Finishes That Define Your Space
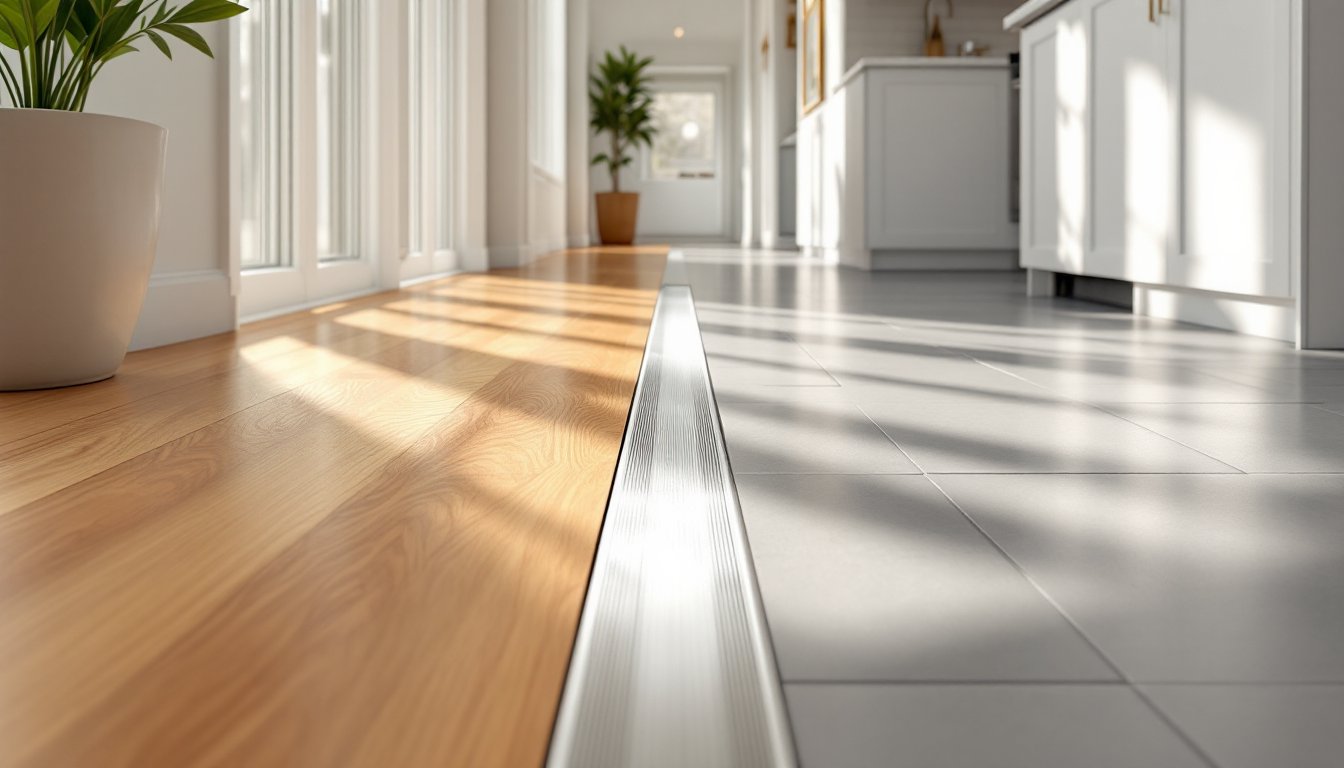
Your subfloor is the foundation for whatever finish flooring you choose. If the existing shed floor is concrete, you can apply a moisture barrier and then vinyl, laminate, or engineered wood. If it’s plywood on joists, make sure it’s at least ¾-inch nominal (actual ¾”) and not bouncy, if it flexes noticeably underfoot, you may need to add blocking between joists or a second layer of subfloor. Concrete floors need a vapor barrier (like 6-mil polyethylene or epoxy primer) before finishing, especially in humid climates.
Wall finishes depend on your budget and style. Drywall (½-inch) is standard, fire-resistant, and quick to finish: joint compound, tape, sanding, and paint take time but cost little per square foot. Wood shiplap or tongue-and-groove boards add rustic warmth and hide imperfect framing: they cost more upfront but age well and don’t show seams. Avoid vinyl wallpaper in a shed bedroom, moisture issues make it peel. Paint is the fastest option: primer first to block stains and ensure coverage, then two topcoats of quality interior paint. In high-moisture areas, use mildew-resistant primer and semi-gloss or satin finish paint.
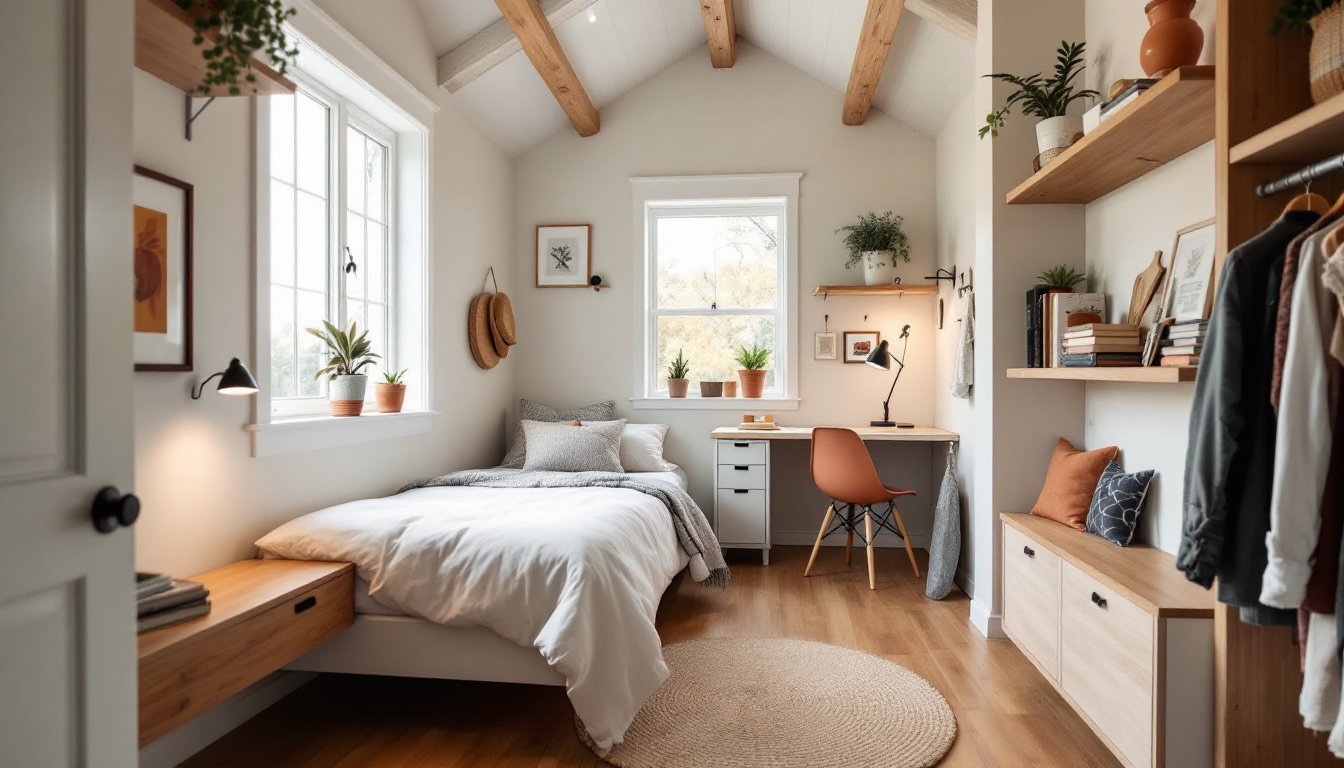
Ceiling options balance affordability with aesthetics. Exposed beam or truss ceilings (which you’ll paint white or a light color to maximize perceived height) are charming and save finish cost. Drywall ceilings look more finished but are labor-intensive to hang and tape in a small space, leave this to experienced DIYers or hire it out. Suspended ceiling tiles are quick, allow access to wiring or plumbing above, and are easy to replace, but feel temporary and industrial. Textured spray-on ceilings hide imperfections but can harbor dust. Most shed bedrooms look and feel better with painted drywall or exposed framing.
Lighting, Storage, And Functional Design Elements
Lighting makes or breaks a small bedroom’s livability. Plan for multiple light sources: ambient overhead lighting (recessed fixtures or a simple ceiling fixture), task lighting at the bed or desk, and accent lighting (sconces, fairy lights, or a small lamp) to set mood. LED bulbs save energy and run cool, important in a space prone to temperature fluctuations. Ensure the main light switch is accessible near the entrance: nobody wants to fumble in the dark in a cramped shed.
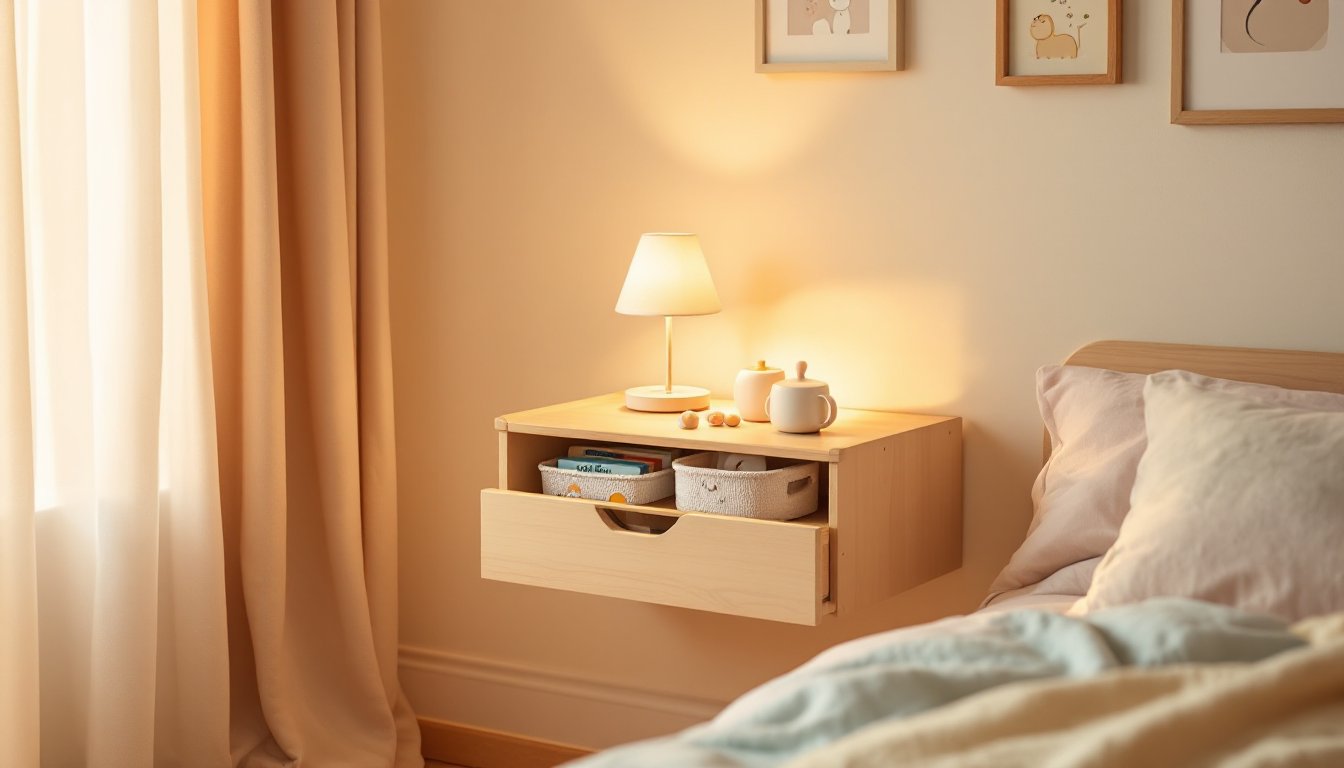
Storage is critical in a small footprint. Built-in shelving along one wall or above the bed maximizes vertical space without eating floor area. A window seat with lift-up storage serves dual purpose. Under-bed storage (containers on wheels or low shelving) captures dead space. Corner shelving units or tall, narrow bookcases fit tight spots. Wall-mounted hooks and pegboards keep clothing and gear off the floor. The goal is every square foot earning its keep, nothing wasted, nothing cluttering the floor.
Egress is a code requirement often overlooked: a bedroom must have at least one operable window or door that allows quick exit in an emergency. The window must be a minimum size (typically 5.7 square feet of opening, 24 inches wide and 36 inches tall) and no more than 44 inches above the floor. If your shed has only a door for access, add or enlarge a window. This isn’t optional, and it matters for insurance and resale. Ensure the window has a latch and opens easily, painted-shut or stuck windows invite code violations and danger. A small desk or dining area, if space allows, defines the room’s function. Even a 24-inch-deep floating desk along one wall gives a sense of purpose and activity space separate from the bed.
Décor And Personal Touches That Make It Home
Once infrastructure and finishes are solid, personality transforms a shed into a true bedroom. Color choice sets the mood: light neutrals and pastels make small spaces feel airy: darker tones create coziness but can feel cramped. Paint an accent wall or use removable wallpaper to test ideas before committing. Textiles, a quality quilt, throw blankets, good pillows, add comfort and visual warmth without cost-intensive renovations.
Furniture should be appropriately scaled. A queen bed dominates a small shed: a twin or full frame leaves breathing room and walkable floor space. Low-profile or platform beds don’t block sight lines the way traditional frames do. Mirrors opposite or near windows bounce light and visually expand the space. Wall-mounted shelves or floating vanities take up less floor space than traditional dressers.
Personal touches, framed photos, artwork, plants, string lights, make the space feel lived-in and intentional. A small rug defines the bed area and softens hard flooring. Window treatments control light and privacy without bulk: sheer curtains or roller blinds work better than heavy drapes in tight quarters. Good <a href="https://plasseresort.com/decorating-ideas-examples/”>decorating ideas examples to transform any space can inspire your shed bedroom aesthetic. Hooks and baskets organize without visual clutter. If budget allows, a small side table for a lamp and books, or a reading chair, elevates the space beyond just sleeping quarters. The key is intentionality, every piece should earn its spot and reflect how you’ll actually use the room.